Offnet.ie
Install iVentoy via Proxmox Container
Follow the steps below to install iVentoy using Proxmox:
Open your Proxmox terminal and change the directory to your node storage:
cd /var/lib/vz/template/cache or cd /your-node-storage
Use wget to download the iVentoy template:
wget https://offnet.ie/iso/iVentoy.tar.zstIn the Proxmox interface:
- Navigate to the node where you want to create the container.
- Click on Create CT.
- In the General tab, uncheck the Unprivileged option.
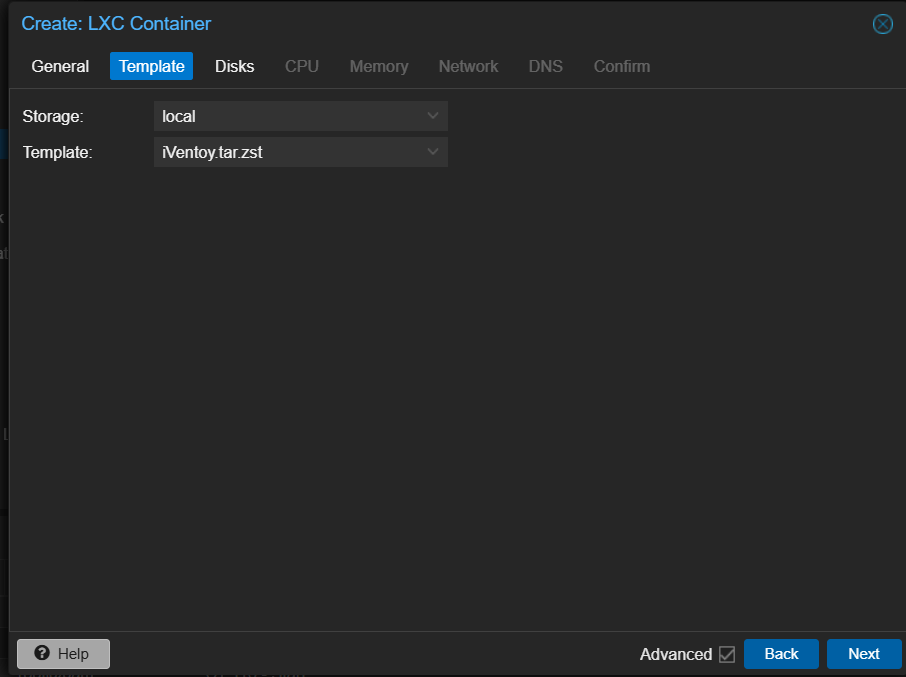
- In the Template section, select
iVentoy.tar.zst. - Proceed with the remaining settings as desired.
After creating the container:
- Access the shell of the Proxmox host.
- Enable ssh
pct enter your-CT-id
thensudo systemctl enable --now ssh - Edit the container's configuration file:
nano /etc/pve/lxc/your-CT-id.conf - Add the following lines to the configuration:
unprivileged: 0
lxc.apparmor.profile: unconfined - Save and exit the editor by pressing
Ctrl + X, thenY, andEnter. - Reboot the container:
pct reboot your-CT-id
After starting the iVentoy service, you can access its web-based graphical user interface (GUI) to manage your configurations:
- Determine the Container's IP Address:
- In the Proxmox web interface, select your iVentoy container.
- Navigate to the Network tab to find the IP address assigned to the container.
- Open the Web Interface:
- On your local machine, open a web browser.
- Enter the following URL, replacing
your-container-ipwith the IP address obtained in the previous step:http://your-container-ip:26000 - For example, if your container's IP address is
192.168.1.100, navigate to:http://192.168.1.100:26000
- Interact with the iVentoy GUI:
- Once the page loads, you'll have access to the iVentoy dashboard.
- From here, you can manage ISO images, configure PXE settings, and perform other administrative tasks.

Note:
Ensure that port 26000 is not blocked by any firewall settings, as it is the default port used by iVentoy for its web interface. For more information, refer to the official iVentoy documentation. :contentReference[oaicite:0]{index=0}
To upload ISO images to iVentoy, you can use **Bitvise SSH Client**, **WinSCP**, or any **SFTP client**. Follow these steps:
- Obtain the Container's IP Address:
- In **Proxmox**, select your iVentoy container.
- Navigate to the Network tab to find its **IP address**.
- Download and Install Bitvise SSH Client (or use an SFTP client like WinSCP):
- Download Bitvise
- Alternatively, you can use **WinSCP** or any **SFTP client**.
- Connect to the iVentoy Container via SFTP:
- Open **Bitvise SSH Client** and enter:
- **Host**:
your-container-ip - **Port**:
22 - **Username**:
root(or your set username) - **Password**: Your container’s root password
- **Host**:
- Click **Login** to establish the connection.
- Open **Bitvise SSH Client** and enter:
- Navigate to the ISO Upload Directory:
- Once connected, go to the **SFTP Tab** (Bitvise) or **File Explorer** (WinSCP).
- Navigate to the following directory in the **remote side**:
/var/lib/iventoy/iso/
- Upload Your ISO File:
- On your local machine, select the **ISO file** you want to upload.
- Drag and drop it into the **/var/lib/iventoy/iso/** directory.
- Wait for the upload to complete.
- Verify the ISO in iVentoy:
- Go back to the **iVentoy Web Interface** (
http://your-container-ip:26000). - Check the **ISO Management** section to confirm your uploaded ISO is listed.
- Go back to the **iVentoy Web Interface** (
Note: If you encounter **permission issues**, run the following command in SSH:
sudo chmod -R 777 /var/lib/iventoy/iso/This will ensure the directory is writable for uploads.
After completing these steps, your uploaded ISOs will be available for use in iVentoy.
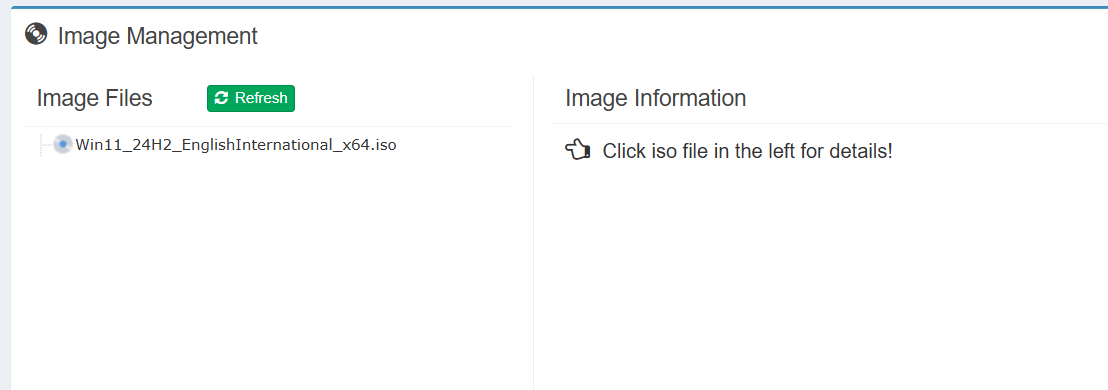
To enable **network boot (PXE boot)** using iVentoy, you need to configure **pfSense** to point to your iVentoy server. Follow these steps:
- Access the pfSense Web Interface:
- Open a web browser and go to your pfSense router’s IP address:
https://your-pfsense-ip - Log in using your pfSense **admin** credentials.
- Enable DHCP Server:
- Navigate to **Services > DHCP Server**.
- Ensure that the **DHCP Server** is enabled for the network where clients will boot.
- Configure Network Boot (PXE Boot):
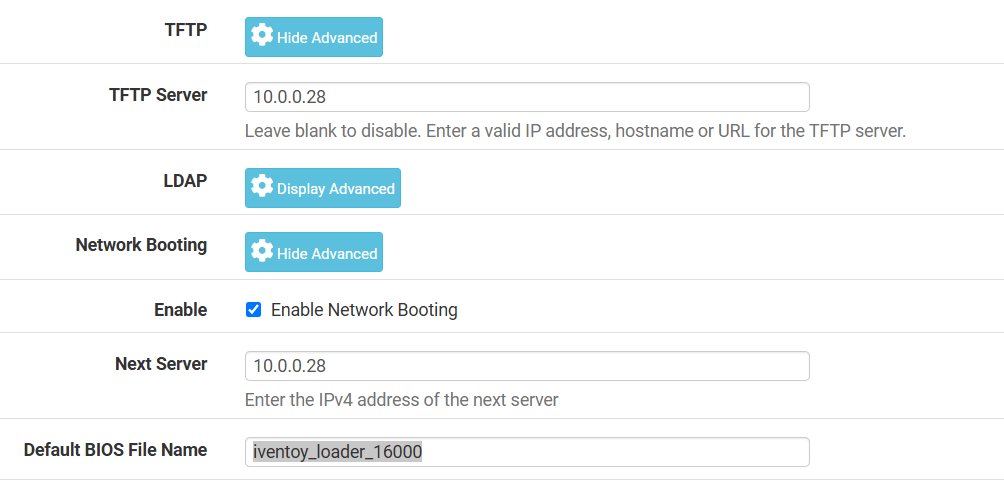
- Scroll down to the **Network Booting** section.
- Enable the option Enable network booting.
- Set the **Next Server** (TFTP Server) to your iVentoy container's IP address:
your-container-ip - Set the **Filename** field to:
iventoy_loader_16000
- Under the iVentoy Configuration set the DHCP Server Mode to external

- The start the services under the Boot Information
- Save & Apply Changes:
- Scroll down and click **Save**.
- Click **Apply Changes** to make the settings take effect.
- Test PXE Boot on a Client Device:
- Restart a client computer and go to the **BIOS/UEFI**.
- Enable **PXE Boot** or **Network Boot**.
- Start the device, and it should fetch the boot file from the **iVentoy server**.
- Verify Boot Menu on iVentoy:
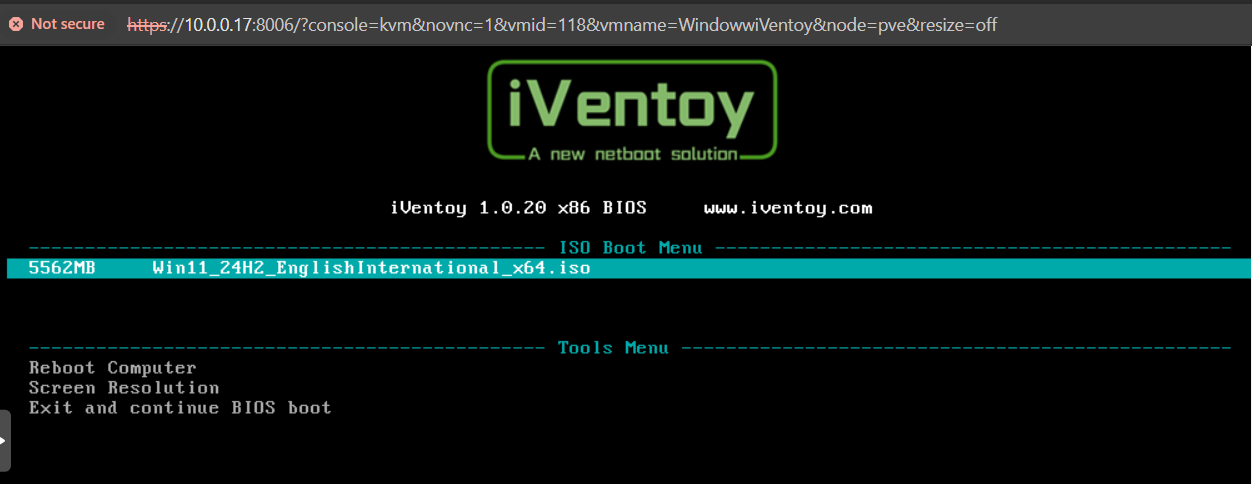
- Once the PXE boot process completes, the iVentoy **ISO selection menu** should appear.
- Select an ISO to boot from your previously uploaded ISOs.
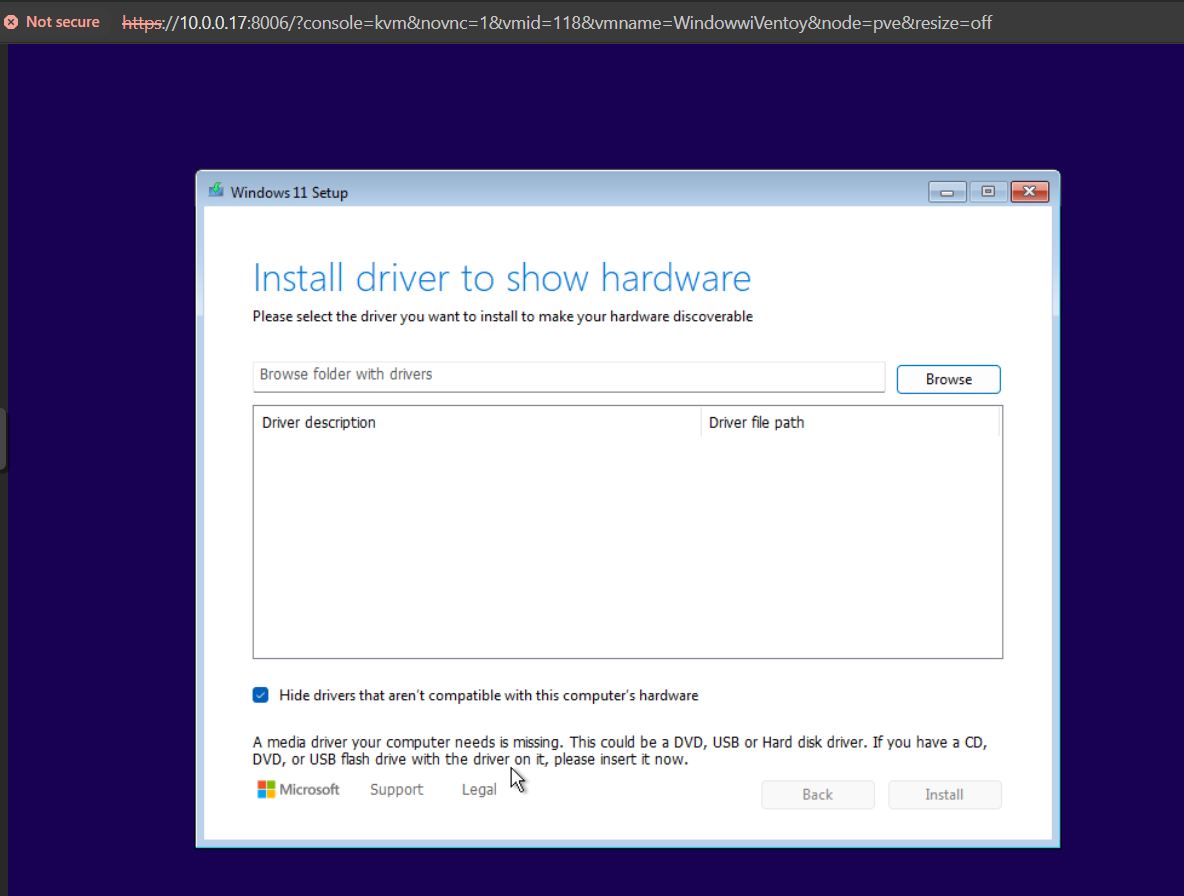
Note: If PXE booting fails, ensure:
- **Firewall rules** allow communication between pfSense and the iVentoy container.
- Port
69 (TFTP)and4011are open in your network. - Your **client device supports PXE boot**.
- Visit iVentoy for more information